
AI image analysis can be surprisingly helpful for spotting visual patterns in rashes, acne, moles, and irritation—especially when used as a structured triage tool rather than a final diagnosis. The safest approach is to treat AI as a way to organize what you see, improve the quality of your documentation, and decide what to do next (monitor, self-care, or seek medical care). Below is a practical, photo-first workflow to get clearer results and avoid common traps.
When you upload a skin photo, many tools can describe features (color, texture, borders, scaling, clustering) and suggest likely categories—such as acne vs. eczema-like irritation vs. fungal-looking rash. That’s useful for creating a short list of possibilities and building better questions for a pharmacist or clinician.
What AI can’t do reliably is provide a definitive diagnosis from one image, especially when the photo is blurry, the lighting is off, or the condition isn’t well represented in the tool’s training data. Pigmented lesions and fast-changing rashes deserve extra caution: AI output should never be used to “rule out” something serious. For skin cancer warning signs, it helps to know the ABCDEs outlined by the American Academy of Dermatology Association.
Where AI tends to shine: organizing symptoms, deciding urgency, tracking changes over time, and preparing for a clinician visit with clearer language and consistent visuals.
Most “wrong” outputs start with unusable images. A few small adjustments can drastically improve clarity and consistency.
Write down what a photo can’t show well: location, onset date, itch vs. pain, any drainage, and whether it’s spreading. Include triggers like a new product, detergent, heat, shaving, sports equipment, or a recent illness.
Take a consistent “set” each time: close-up + context + scale. Label the files by date (and left/right side if relevant). Consistency beats perfection—repeatable images make trends obvious.
Not all tools behave the same way. Some describe what’s visible; others try to “diagnose.” Picking the right category improves both usefulness and safety. The U.S. Food & Drug Administration offers helpful background on oversight of AI/ML-based software as a medical device (FDA overview), which can clarify why consumer tools vary so widely.
| Tool type | Best for | Common pitfalls | Good safety practice |
|---|---|---|---|
| General visual AI | Describing appearance; generating questions | Overconfident wording; inconsistent labels | Ask for uncertainty and red-flag criteria; don’t treat as diagnosis |
| Symptom checker + photo | Triage plus symptom context | Can miss nuance; may oversimplify | Enter full history and medications; verify urgent symptoms separately |
| Derm-focused analyzer | More structured lesion/rash categories | Coverage gaps by skin tone/rare conditions | Use for monitoring and visit prep; escalate if changing fast |
| Teledermatology (clinician review) | Highest-value interpretation from photos | Requires good images; may need follow-up questions | Include multiple angles, scale, timeline, and symptom notes |
For moles or pigmented lesions: any new or changing spot, bleeding, a non-healing sore, or asymmetry/color variation should be evaluated by a clinician. For babies and children, rash guidance can differ; the NHS overview on rashes in babies and children provides a clear “when to seek help” checklist.
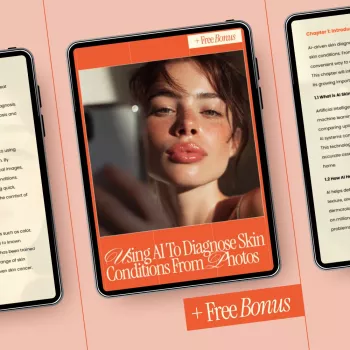
If you want a repeatable system (and fewer “maybe it’s better?” guesses), a structured template helps. Using AI to Diagnose Skin Conditions from Photos (digital download) is designed to standardize your photos, symptom notes, and week-to-week comparisons so AI outputs (and clinician reviews) are easier to interpret.
For a separate kind of “visual organization,” Define Your Style With a Mood Board (digital download) helps you build a clear reference board—useful when you want consistent visual decisions and less trial-and-error in personal styling.
Accuracy varies widely by tool, photo quality, and whether the condition and skin tone are well represented in the training data. It’s best used for triage and support (organizing observations and urgency), not as a definitive diagnosis—especially for changing pigmented lesions or rapidly worsening rashes.
Upload a close-up (sharp detail), a mid-range context photo (surrounding area), and a shot with scale (coin or ruler nearby). Use bright, indirect daylight, take 2–3 angles for raised or irregular spots, and repeat photos consistently over time for tracking.
It can be, but privacy depends on whether the service stores images, uses them for training, or shares them with third parties. De-identify whenever possible (avoid faces and distinctive marks) and use secure clinician portals when you need medical review.




Leave a comment