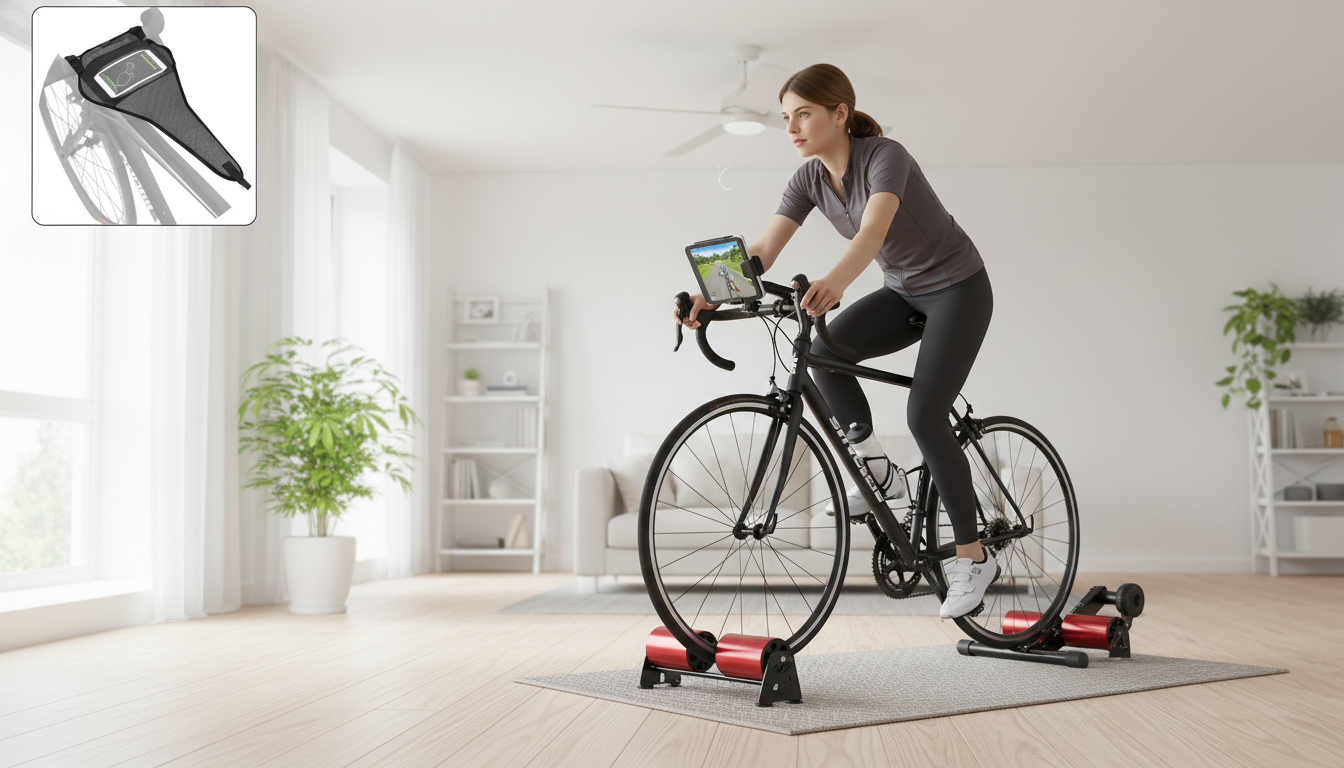
A magnetic bike trainer turns an outdoor bicycle into a consistent indoor setup for endurance, intervals, and warm-ups. With controllable resistance and a stable frame, it supports structured training while reducing weather and traffic variables. This guide covers how magnetic trainers work, what to look for before buying, how to set one up correctly, and how to get the best ride feel with less noise and tire wear.
A wheel-on magnetic trainer creates resistance by pressing a roller against your rear tire while a magnetic unit controls the load. The result is a repeatable indoor ride that feels steady enough for base miles and controlled enough for intervals.
For general fitness, consistent indoor riding can also help meet weekly activity targets recommended by public health guidance such as the CDC adult physical activity recommendations.
Magnetic resistance typically ramps up smoothly and is easy to control for steady efforts and short intervals. It’s especially practical when you want quick resistance changes without stepping into the cost and compatibility checks that come with many direct-drive systems.
That said, ride feel depends heavily on setup details—tire pressure, roller tension, and tire compound. Keeping those consistent makes workouts more repeatable week to week.
| Type | Typical strengths | Typical trade-offs |
|---|---|---|
| Magnetic (wheel-on) | Adjustable resistance, durable, predictable workouts | Tire wear, more noise than direct-drive, setup affects feel |
| Fluid (wheel-on) | Progressive resistance feel, simple design | Less direct adjustability, can get loud at high speed |
| Direct-drive | No tire slip, often quieter, better for power-based training | Higher cost, requires cassette/compatibility checks |
| Balance rollers | Improves stability and pedaling smoothness | Steeper learning curve, less stable for maximal efforts |
If tire performance and rolling efficiency are a priority, it’s helpful to understand how pressure and compound influence resistance; resources like Bicycle Rolling Resistance break down the fundamentals in a practical way.
A magnetic trainer can feel surprisingly smooth when the basics are dialed in. Small changes—like tire pressure drifting between sessions—can make the same resistance setting feel harder (or easier) than expected.
| Item | Goal | Common mistake to avoid |
|---|---|---|
| Tire pressure | Keep consistent between sessions | Starting low and increasing mid-ride (changes workout load) |
| Roller tension | No slip during seated accelerations | Over-tightening (extra noise and tire wear) |
| Floor surface | Stable, vibration-damping | Bare concrete/wood without a mat (louder, more movement) |
| Cooling | Strong airflow at torso/head level | Underestimating indoor heat (early fatigue) |
For training structure (especially if you’re returning from time off or building fitness gradually), guidance from exercise science organizations like ACSM resources on exercise testing and prescription can help frame intensity and progression appropriately.
If you want a straightforward way to convert a standard bicycle into an indoor workout setup, the Bicycle Training Roller Magnetic Exercise Bike Trainer is built around magnetic resistance for controlled, repeatable sessions. It’s a strong fit for consistent indoor miles, structured intervals, and warm-ups when outdoor riding isn’t practical.
For riders who like a clear plan and measurable targets, pairing training with a simple goal framework can help keep consistency high over time. A practical planning aid is Aim High, Teach Bold: A Practical Guide to Goal Setting for Teachers & Educators, which can be adapted to set weekly SMART-style training goals and track progress.
Most work with many bikes, but you’ll want to confirm the supported wheel size range, your rear axle type (quick-release vs. thru-axle and whether an adapter is needed), and that your frame and derailleur area clear the trainer. It’s also worth checking tire condition since worn or damaged tires slip more easily.
Increase roller tension gradually until seated accelerations don’t slip, and keep tire pressure consistent from session to session. Make sure the roller and tire contact surface are clean, and avoid using a worn tire; over-tightening can reduce slip but will add noise and accelerate tire wear.
Noise mainly comes from tire-to-roller contact and vibration traveling into the floor. A training mat, a trainer-specific tire, smooth pedaling, correct roller tension, and a stable surface can noticeably reduce perceived loudness.






Leave a comment